Contributing to open source can be challenging especially when using the command options (git). It can be prone to typographical errors, difficult to understand as a newbie and difficult to setup the git environment.
But with the help of the GitHub web GUI open source has been made easy just click, click and click, the work is done.
Simply put, Git is a command line tool that lets you manage and keep track of your source code history. GitHub is a cloud-based hosting service that lets you manage Git repositories. If you have open-source projects that use Git, then GitHub is designed to help you better manage them with the help of its Web-based graphical interface.
However, by the end of this episode I guess you can comfortably beat your chest and say "I can contribute to open source without fear", that sounds hilarious right?
Let's get started!!
Note: In this article, I will be contributing to the newbieDictionary repository, maintained by FSipiano.
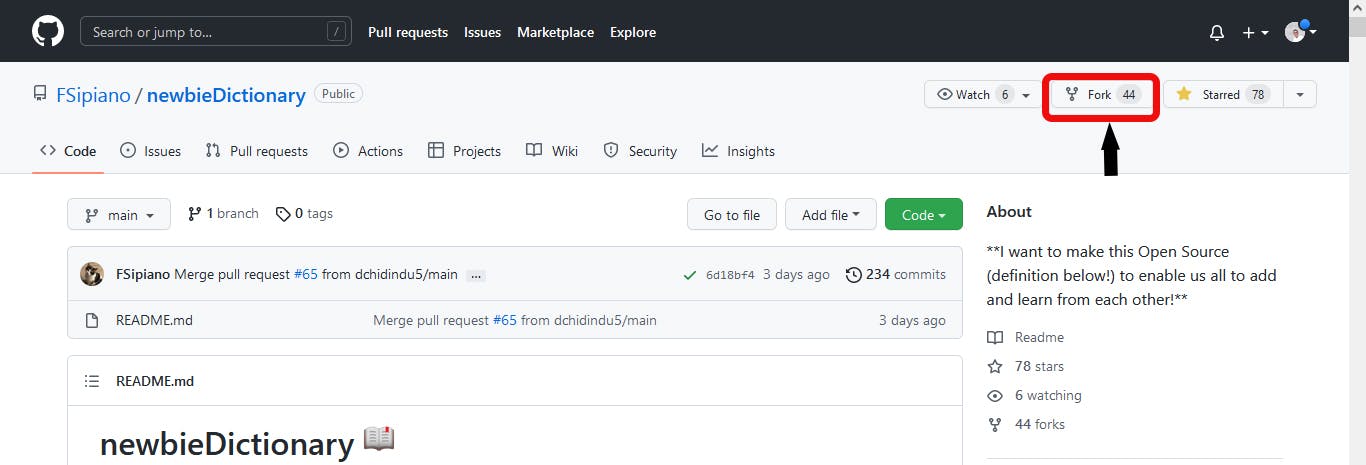
Step 1: Navigate to the repository you want to make changes to.
In the squared region as shown in the image below, The name on the left hand side belongs to the creator of the repos, while the name on the right hand side, shows the name of the repository.

Step 2: Fork the repository by clicking on the fork tab on the top right corner of your page.
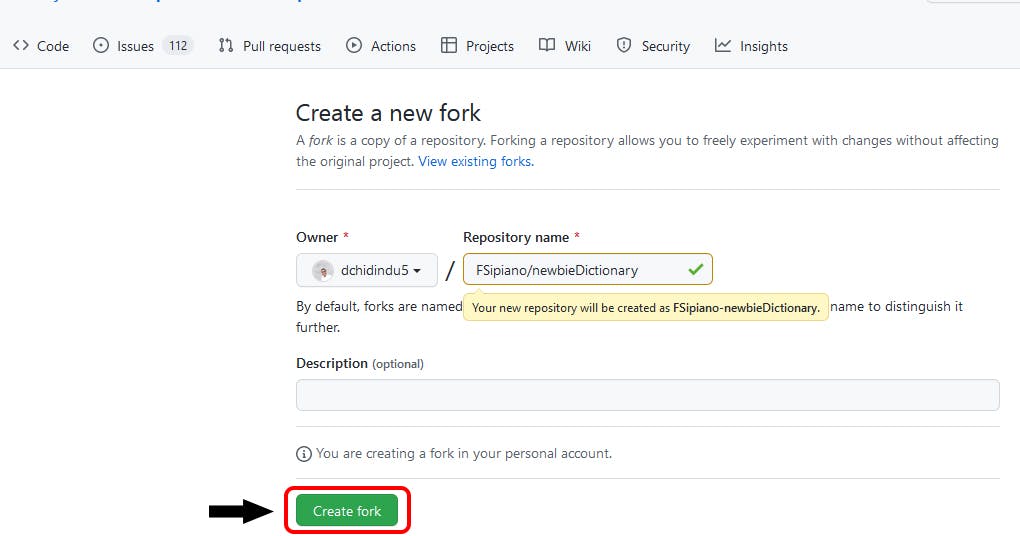
Step 3: Create a new fork as shown below.
Note that the page shown below only shows up when you're forking the repos for the first time.
Step 4: After the repository has been forked, you'll have a duplicate of the original repository in your dashboard where you can play with without affecting the original repository, As shown below

Step 5: Navigate to any file you want to make changes to and Click on the pencil icon to edit the document.

During the course of this writing I made changes to the README file by improving the definition of a word. After making the changes click on preview to see the changes you've made before moving to the next step.
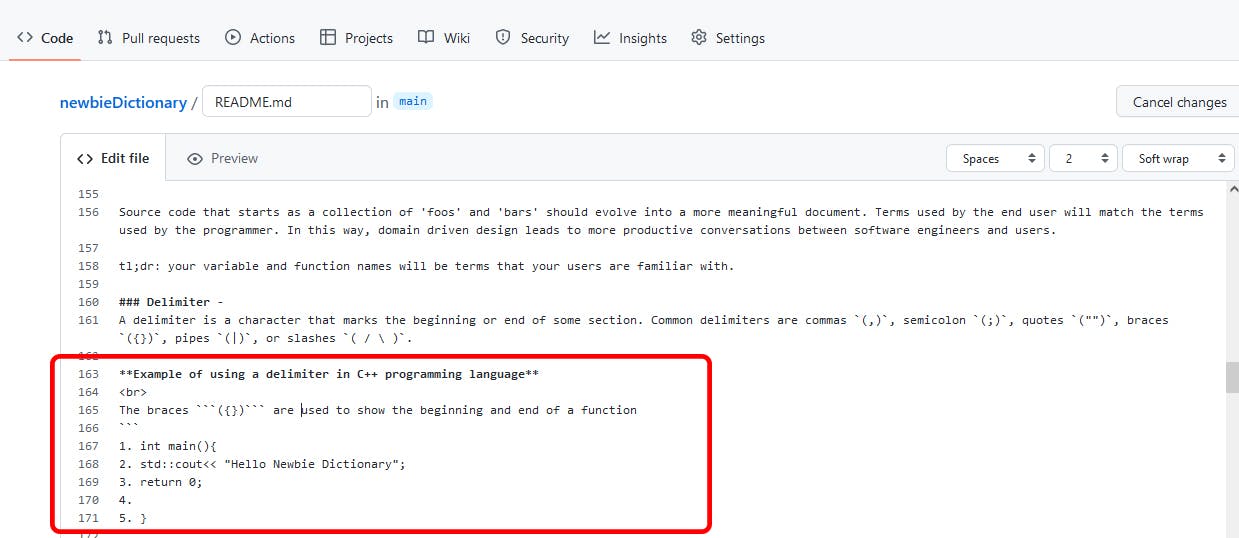
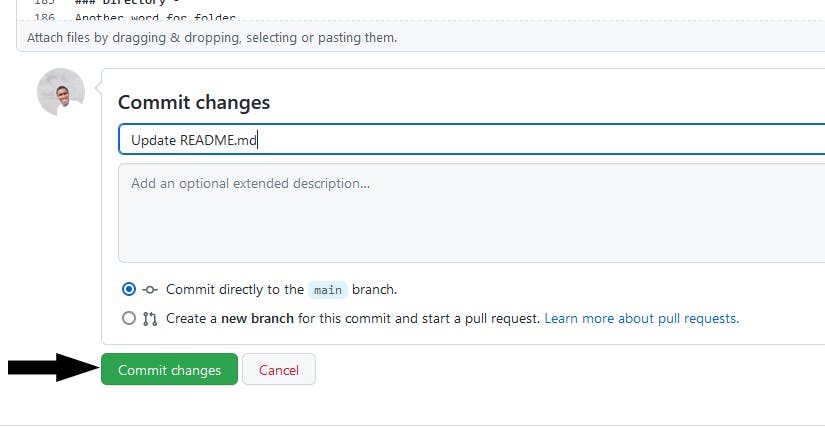
Step 6: After the changes has been made, scroll down to the bottom of the page and add a description of the changes you've made to the file in the markdown editor as shown below
since the changes were made in a forked repository, commit the changes directly to your main branch, by choosing the first option.
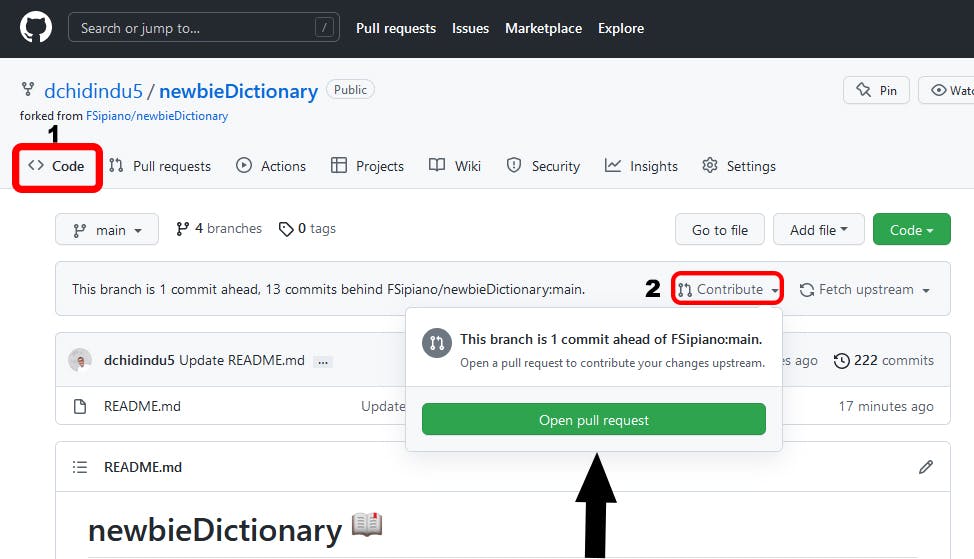
Step 7: After the changes has been committed, while you're still on the forked repos, click on the <> code section on the left hand side of the page labelled 1. You'll be directed to the main page of the repo then
Click the contribute tab and open a pull request as shown in the image below.
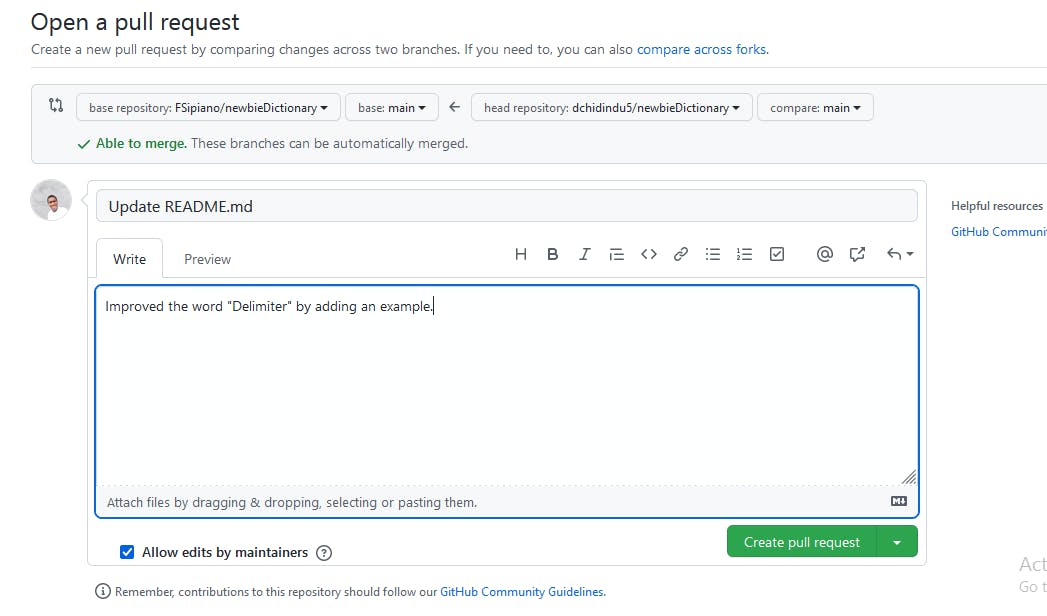
Step 8: Add a brief description below before creating a Pull Request.
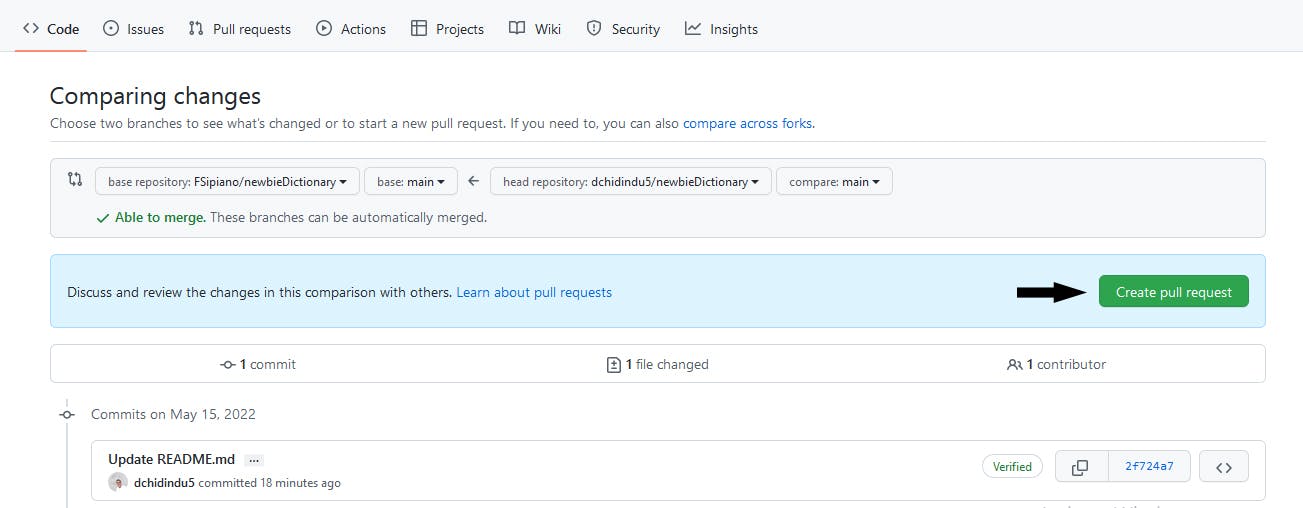
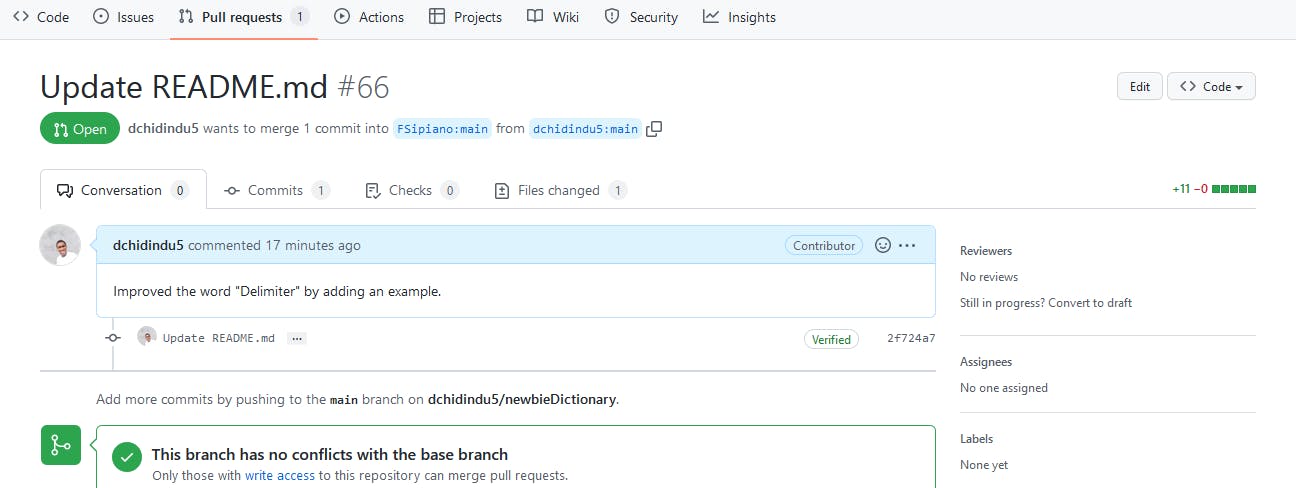
Step 9: To confirm that your pull request was created head straight to the main repository not the forked repository. click on the Pull requests tab and check out your own request on the queue, usually a recently added pull request will be at the top of the list.
Step 10: Congratulations!! Felicitation!! Herzlicken Gluckwunsch!! Felicidades!! you've successfully contributed to an open source project. Wait patiently for the moderators to review and merge your changes though it may take hours or days to review.
Summary
In this episode, we saw how we could do basic contribution from the web. It’s not the best for making lots of new content, but it’s pretty convenient for quick edits. The best way to effectively use the GitHub platform is to use the git command options. I give credit to Faye Sipiano, the maintainer of newbie Dictionary for giving newbie's the chance to contribute to open source projects. We will now see more advanced ways to do the same things in subsequent episodes - you can always check back on the web to see the effect.
